Whenever you tap on a text field on your iPhone, it knows that you have to type and naturally will bring up the default QWERTY keyboard on the half of the screen. It’s a quick and convenient approach to get typing when you have to; however, have you at any point stopped to think that maybe your keyboard could be doing more for you? In previous iOS versions, one could just utilize the stock iOS keyboard in all the applications. With iOS 8 Extensions, Apple has removed this limitation and allows the user to use their favorite keyboard throughout the system. It allows developers to create custom keyboards so that users can easily use the custom-made input to enter their text in iMessages, emails, and so on.
Custom keyboards have been a standout amongst the most significant additions to iOS since its inception. It replaces the system keyboard for users who want capabilities such as a novel text input method or the ability to enter text in a language that not supported in iOS. The basic function of a custom keyboard is simple, respond to taps, gestures, or other input events, and give text in the form of an unattributed object at the text insertion purpose of the present text input object. From better predictive text to cloud syncing and swipe-to-type, there are a few to choose from, including some names you’ll recognize. You could even use a keyboard to insert a gif or image.
Here are the steps you’ll need to follow for creating a custom keyboard for an iOS application.
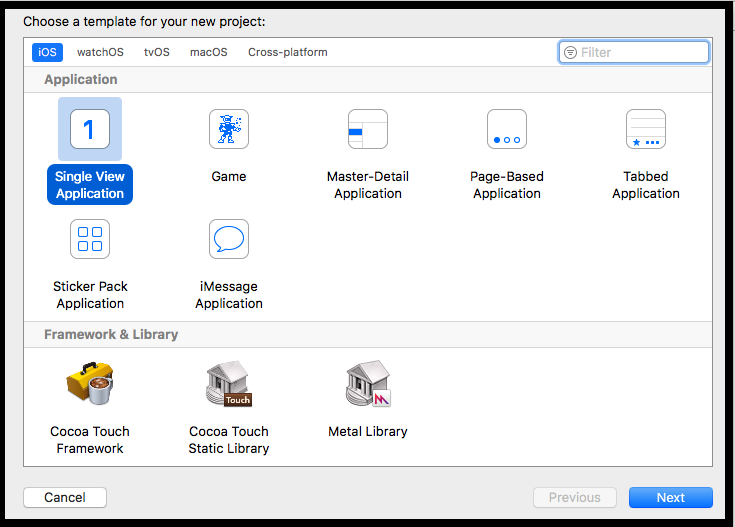
In Xcode, choose File > New > Project, and in the iOS Application, template group chooses the Single View Application template.
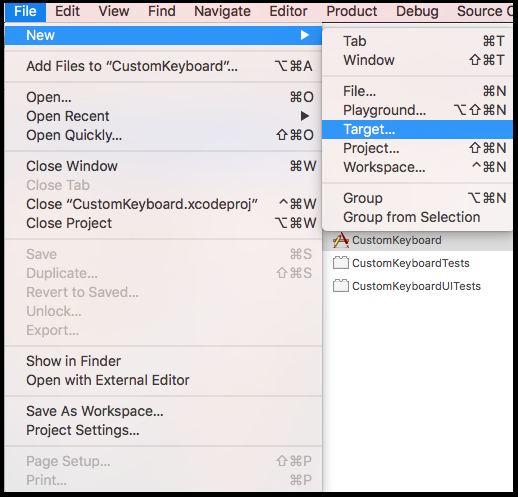
Add a new target for your custom keyboard extension.
Select Custom Keyboard Extension and name it. Now, select the project file in the Project Navigator and add a new target by clicking the ‘+’ button at the bottom.
Next, select the Application Extension on the left and choose the Custom Keyboard template as depicted below.
Active your keyboard scheme for building and debugging. Make sure you select your app as your target (not the keyboard) and run your app. It should be a blank white view.
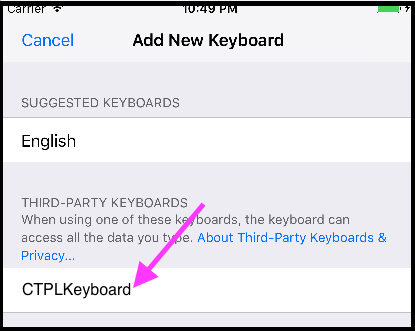
In your simulator, hit command/window + Shift + H to go back to your home screen and go to Settings/General/Keyboard/Keyboards/Add New Keyboard…/CTPLKeyboard.
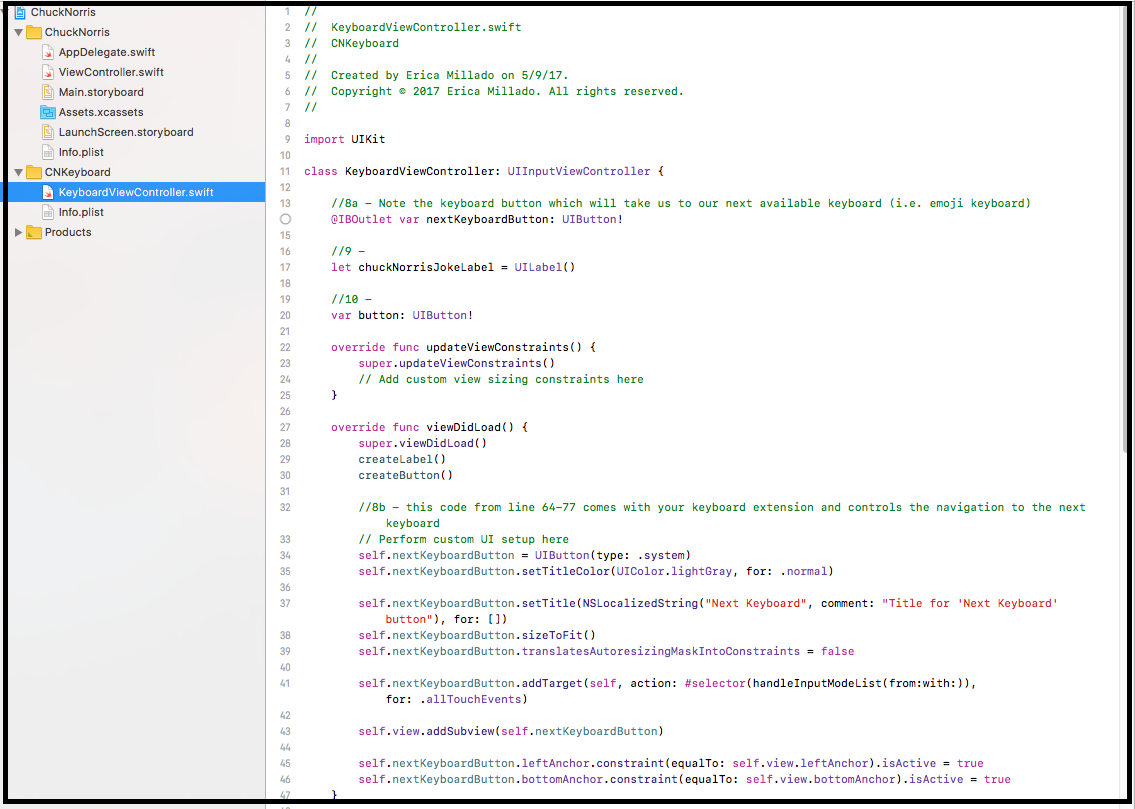
In your file navigator, select the KeyboardViewController.swift file that was created when you created your keyboard extension. Note the (1a) nextKeyboardButton and (1b) nextKeyboardButton code (in viewDidLoad). These lines of code control the navigation from a keyboard to keyboard (i.e. your emoji keyboard).
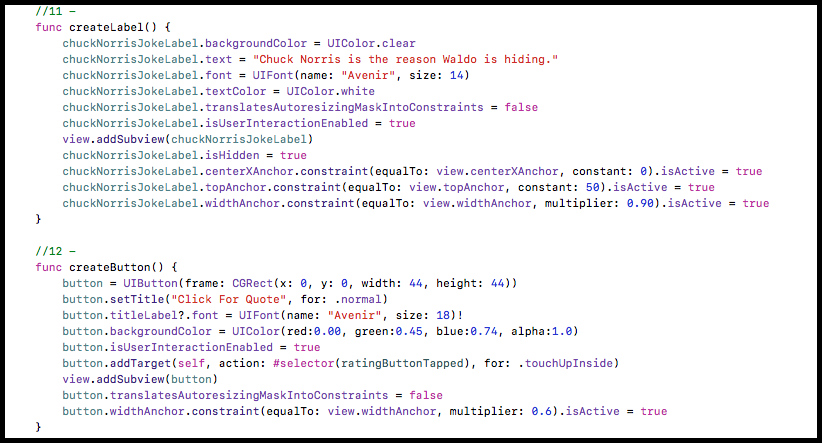
Create a UILabel property for your CTPLKeyboard text. Create a button. When this button is pressed, the CTPLKeyboard will be displayed.
Programmatically format your label and constrain it to your view. Here is where you entered the CTPLKeyboard text, changed the font and hide the text from view. Make sure to call this createLabel( ) function in viewDidLoad( ).
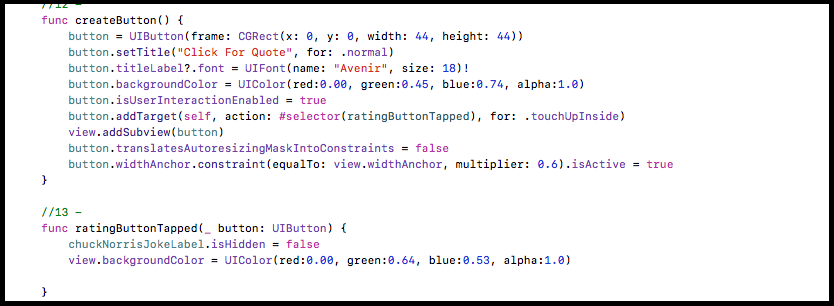
Here, you can change the button text and font and add a target method that is called. by calling this createButton( ) method in viewDidLoad( ).
Write the method ratingButtonTapped( ) that is called when the button is tapped. This ratingButtonTapped( ) function should unhide the Label.
With the release of iOS 8, Apple enabled third-party developers to make Custom keyboard applications that users could download and either replace with their existing keyboard or use as an extension of their existing stock keyboard. From that point forward there have been many keyboards developed.
SEE ALSO: How to Build an iOS App?
iPhone users are using keyboard extensions for sending personal emoji’s, to searching for gifs, to change the way they tap the screen and more. It offers users new features and functionality, improves typing and autocorrects accuracy. By this you will get features such as super-accurate autocorrect and intelligent next-word prediction, reducing keystrokes and getting smarter over time. IOS 8’s Custom keyboard app extensions are going to bring about much-needed flexibility changes to the iOS ecosystem.


