
Firebase is a comprehensive app development platform provided by Google that offers a suite of cloud-based tools and services to help developers build, improve, and grow their applications. It provides functionalities such as real-time databases, authentication, analytics, and cloud storage, allowing developers to focus on creating high-quality user experiences while handling backend infrastructure, app performance, and user engagement seamlessly.
What is Firebase?
Google’s well-known mobile app development platform Firebase enables you to create and expand games and apps based on user preferences. It provides a variety of tools and resources for making mobile and online applications.
In addition to its features, which include cloud messaging, hosting, real-time database administration, authentication, and more, it helps developers with their work. Moreover, Firebase is compatible with iOS and offers Firebase Authentication iOS as one of its next-generation solutions.
Firebase Authentication:
A service provided by Firebase with iOS that allows developers to easily implement secure user authentication in their web and mobile applications. It supports various authentication methods, including email/password, phone authentication, and integration with third-party identity providers like Google, Facebook, Twitter, GitHub, and more. Firebase Authentication handles the complex authentication processes, enabling developers to focus on enhancing the user experience without worrying about the underlying authentication infrastructure.
Steps To Authenticate Firebase on iOS
Before starting with Firebase Authentication in iOS, let us integrate Firebase into our project.
Step 1: Create a Firebase Project
To begin using Firebase Authentication and other Firebase services in your iOS application, you need to create a Firebase project. Follow these detailed steps to set up your Firebase project:
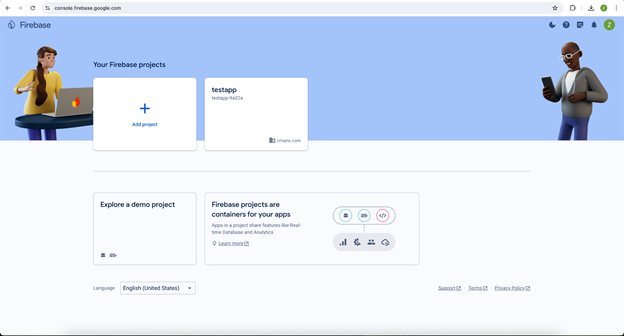
1. Go to the Firebase Console
- Open your web browser and navigate to the Firebase Console.
Sign In to Firebase
- Sign in using your Google account. If you don’t have a Google account, create one.
3. Add a New Project
- In the Firebase Console, click the “Add Project” button.
4. Create a New Project
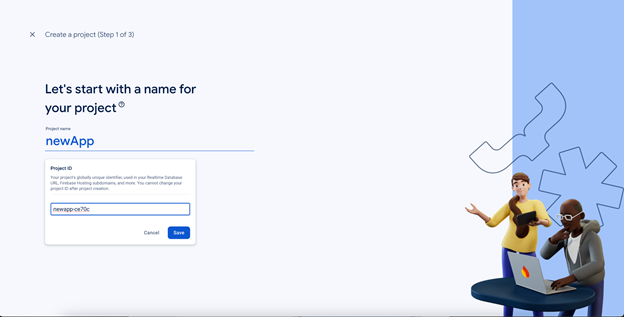
- In step-1 you have to enter the desired project name to start a new project. This name will help you identify the project in the Firebase Console.
- Optionally, you can edit the project ID displayed below the project name. The project ID is a unique identifier for your project across all of Firebase and Google Cloud.
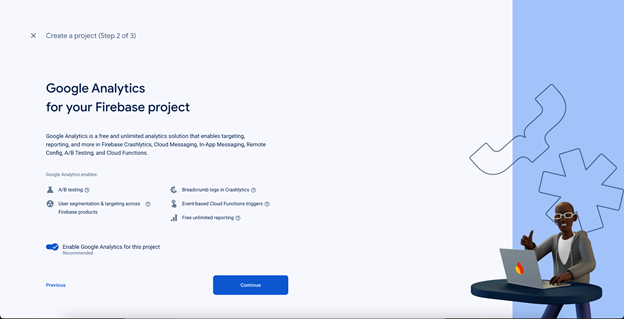
- In step-2 you can enable or disable the google analytics as per your project requirements.
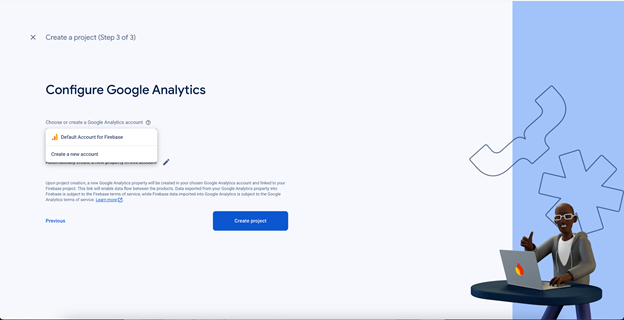
- In step-3 you can select the default account for firebase or create new account for Google Analytics as per your project requirement then click “Create Project” which will take a couple of minutes and your project will be created successfully.
Step 2: Register Your App In Firebase Console
To use Firebase services in your Apple app, you need to register your app with your Firebase project. Follow these steps to register your iOS app with Firebase:
1. Go to the Firebase Console
- Open your web browser and navigate to the Firebase Console.
2. Access Your Project
- In the Firebase Console, click on the project you created in Step 1 to open the project overview.
3. Add an iOS App
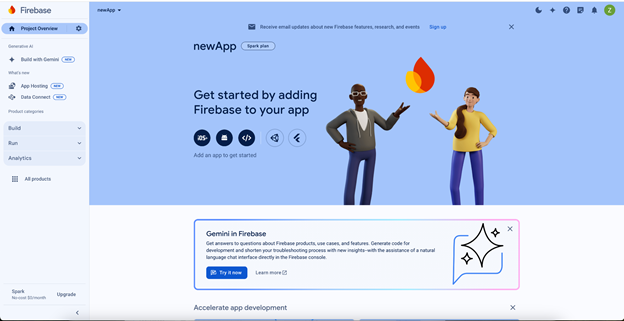
- On the project overview page, click the iOS+ symbol located in the center of the project summary page.
- If you have already added an app to your Firebase project, click “Add app” to show the platform options.
4. Enter Your App’s Bundle ID
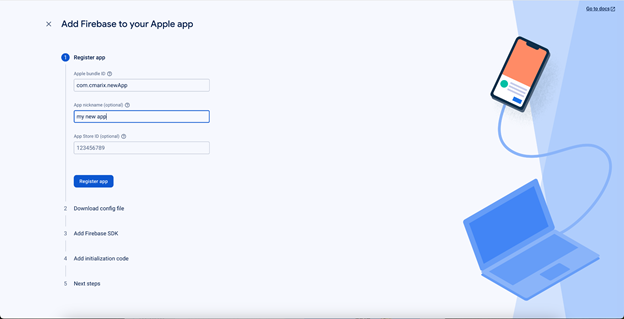
- In the “iOS bundle ID” field, enter your app’s bundle ID. This is the unique identifier for your app, usually in the format “com.yourcompany.yourapp”.
5. (Optional) Enter Other App Information
- Optionally, enter an app nickname. This nickname is an internal identifier within the Firebase Console and can help you distinguish between multiple apps.
- Optionally, enter your app’s App Store ID if it’s already published on the App Store. This helps Firebase link your app to its store listing.
6. Click “Register App”
- After filling in the required fields, click the “Register app” button.
By completing these steps, you have successfully registered your iOS app with your Firebase project.
Step 3: Add a new Firebase Configuration File
To integrate Firebase with your iOS app, you need to add a configuration file to your Xcode project. Follow these steps to download and add the GoogleService-Info.plist file to your project:
1. Download the GoogleService-Info.plist File
- After registering your app with Firebase (Step 2), you will be prompted to download the Firebase configuration file.
- Click the “Download GoogleService-Info.plist” button to obtain your Firebase Apple Platform config file (GoogleService-Info.plist).
2. Move the Config File to Your Xcode Project
- Locate the downloaded GoogleService-Info.plist file on your computer.
- Open your Xcode project.
- Drag and drop the GoogleService-Info.plist file into the root of your Xcode project in the project navigator. This is usually the top-level directory in your project.
- If prompted, ensure that the config file is added to all targets. This ensures that the configuration is available to the entire app.
By following these steps, you have successfully added the Firebase configuration file to your Xcode project. This file contains all the necessary configuration details for Firebase services to work with your app.
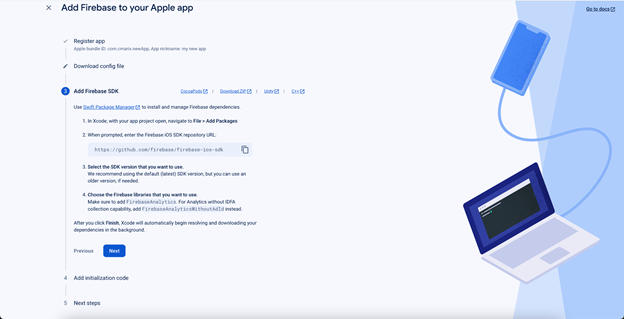
Step 4: Add Firebase SDKs To Your App
To integrate Firebase Authentication and other Firebase services into your iOS app, you need to add Firebase SDKs using Swift Package Manager. Follow these steps to install and manage Firebase dependencies in your Xcode project:
1. Open Xcode Project:
- Launch Xcode and open your iOS app project.
2. Navigate to File > Add Packages:
- In Xcode, navigate to the menu bar at the top of the screen.
- Click on “File” and then select “Add Packages” from the dropdown menu.
3. Add Firebase iOS SDK Repository:
- In the prompt window, you’ll be asked to add a package repository URL.
- Enter the following URL for the Firebase iOS SDK repository: https://github.com/firebase/firebase-ios-sdk.
4. Choose the Firebase Modules:
- After adding the Firebase iOS SDK repository, Xcode will fetch the available packages.
- Select the Firebase modules you want to use in your project. For example, for Firebase Authentication, choose FirebaseAuth.
5. Wait for Dependencies to be Resolved and Downloaded:
- Xcode will automatically resolve and download the Firebase dependencies in the background.
- Wait for Xcode to finish downloading the dependencies. You can monitor the progress in the Xcode activity viewer.
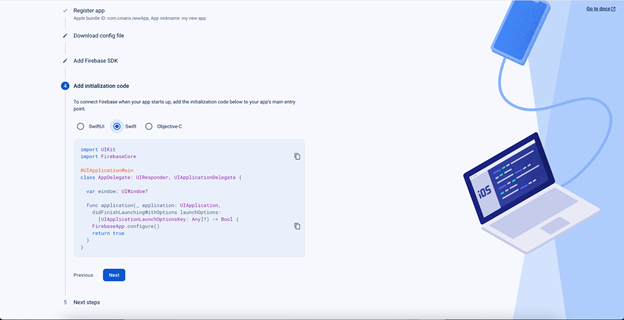
Step 5: Initialize Firebase in your App
To use Firebase services in your iOS app, you need to initialize Firebase. Follow these steps to initialize Firebase in your Xcode project:
1. Import Firebase Module
- Open your AppDelegate.swift file.
2. Add Firebase Import Statement
- At the top of your AppDelegate.swift file, import the Firebase module
import Firebase
import FirebaseCore
3. Configure Firebase
● In the application(_:didFinishLaunchingWithOptions:) method of your AppDelegate.swift file, add the following line to configure Firebase:
FirebaseApp.configure()
4. Complete Initialization
Your AppDelegate.swift file should now look similar to the following
import UIKit
import Firebase
@UIApplicationMain
class AppDelegate: UIResponder, UIApplicationDelegate { func application(_ application: UIApplication, didFinishLaunchingWithOptions launchOptions: [UIApplication.LaunchOptionsKey: Any]?) -> Bool { // Override point for customization after application launch. FirebaseApp.configure() return true }
}
5. Build and Run:
- Build and run your Xcode project to ensure that Firebase is initialized properly.
Sign-Up New Users in Firebase Authentication (iOS)
Firebase Authentication provides easy-to-use SDKs and ready-made UI libraries to authenticate users in your iOS app. Follow these steps to implement user sign-up functionality using Firebase Authentication:
1. Import Firebase Module
- Make sure you have Firebase set up in your Xcode project as described in the previous steps.
2. Implement Sign-Up UI
- Create a sign-up screen in your app where users can enter their email and password.
3. Add Sign-Up Code
- In the sign-up view controller, add code to handle user sign-up using Firebase Authentication.
- Use the Auth.auth().createUser method to create a new user with email and password
Auth.auth().createUser(withEmail: email, password: password) { authResult, error in guard let user = authResult?.user, error == nil else { // Handle sign-up error return } // User signed up successfully
}
4. Handle Sign-Up Result
- In the completion block of createUser method, handle the sign-up result.
- If sign-up is successful, you can perform additional tasks such as updating user profile or navigating to the apa’s main screen.
- If an error occurs during sign-up, handle the error appropriately and provide feedback to the user.
5. Test Sign-Up Functionality:
- Build and run your app to test the sign-up functionality.
- Verify that users can sign up successfully and that errors are handled gracefully.
Example Sign-Up Code:
import Firebase
// Function to handle user sign-up
func signUp(email: String, password: String) { Auth.auth().createUser(withEmail: email, password: password) { authResult, error in guard let user = authResult?.user, error == nil else { // Handle sign-up error print("Error signing up: \(error!.localizedDescription)") return } // User signed up successfully print("User signed up with uid: \(user.uid)") // Perform additional tasks if needed }
}
Sign-In as an Existing User in Firebase Authentication (iOS)
Firebase Authentication provides easy-to-use SDKs and ready-made UI libraries to authenticate users in your iOS app. Follow these steps to implement user sign-in functionality using Firebase Authentication:
1. Import Firebase Module
- Make sure you have Firebase set up in your Xcode project as described in the previous steps.
2. Implement Sign-In UI
- Create a sign-in screen in your app where users can enter their email and password.
3. Add Sign-In Code
- In the sign-in view controller, add code to handle user sign-in using Firebase Authentication.
- Use the Auth.auth().signIn method to sign in an existing user with email and password
Auth.auth().signIn(withEmail: email, password: password) { authResult, error in guard let user = authResult?.user, error == nil else { // Handle sign-in error return } // User signed in successfully
}
4. Handle Sign-In Result
- In the completion block of signIn method, handle the sign-in result.
- If sign-in is successful, you can perform additional tasks such as navigating to the app’s main screen.
- If an error occurs during sign-in, handle the error appropriately and provide feedback to the user.
5. Test Sign-In Functionality
- Build and run your app to test the sign-in functionality.
- Verify that users can sign in successfully and that errors are handled gracefully.
Example Sign-In Code:
import Firebase
// Function to handle user sign-in
func signIn(email: String, password: String) { Auth.auth().signIn(withEmail: email, password: password) { authResult, error in guard let user = authResult?.user, error == nil else { // Handle sign-in error print("Error signing in: \(error!.localizedDescription)") return } // User signed in successfully print("User signed in with uid: \(user.uid)") // Perform additional tasks if needed }
}
Get Current User in Firebase Authentication in iOS
To retrieve the current user in Firebase Authentication on iOS, you can use the currentUser property provided by the Auth class. This property returns the currently signed-in user, if any, or nil if no user is signed in. Here’s how you can get the current user:
import Firebase
// Get the current user
if let currentUser = Auth.auth().currentUser { // User is signed in let uid = currentUser.uid let email = currentUser.email // You can access other user properties as needed print("Current user UID: \(uid)") print("Current user email: \(email ?? "Email not available")")
} else { // No user is signed in print("No user is currently signed in")
}
In the above code:
- We use Auth.auth().currentUser to retrieve the current user.
- If a user is signed in, we access properties like uid and email of the current user.
- If no user is signed in, we handle that case accordingly.
Make sure to import the Firebase module (import Firebase) at the top of your Swift file where you’re using Firebase Authentication. This code snippet can be used in various parts of your app where you need to check the authentication status or retrieve information about the current user.
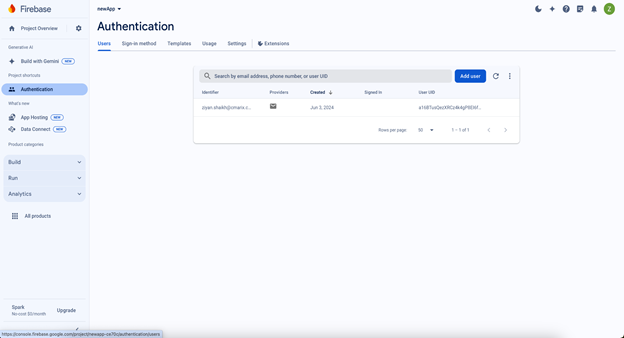
You can visit console firebase google to view the signup user list in the Firebase console.
Conclusion
With these instructions, we intend to distinguish Google Firebase Authentication iOS as a dependable, intuitive, and feature-rich approach to integrating authentication into iOS apps. Firebase Auth provides real-time tools and assistance to help you develop a safe and seamless user authentication experience, regardless of the size of your business.
Hire iOS app developers from us to make the most out of your iOS projects if you’re a business owner and unsure about how Firebase Auth iOS can help your company by providing individualized expertise and security for your end consumers.